You’ll find guides and tips on how to get started and how to make your chatbot perform better.
Basic steps to create a dialog.
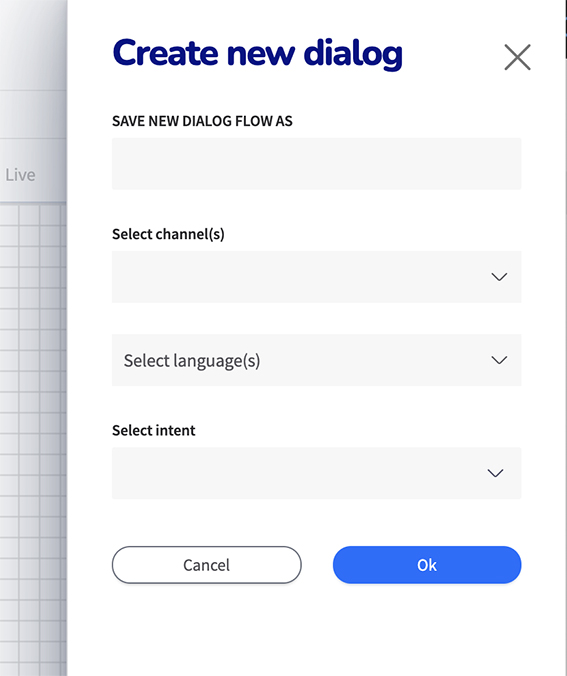
1. Click “Create new dialog”.
2. Try to make the title concise and specific, for example: “Newsletter signup”. Note that you must have a title.
3. Select the channel(s) the flow will be used for.
4. Select the language(s) you want to produce the flow for.
5. Select the intent that most aptly describes the general area of your flow. If you can’t find an intent matching your flow, you have to first create a new intent in the app “AI Training”, for it to appear here in Dialog Editor. It’s not necessary for a dialog to have a selected intent.
Insert a node into your dialog.
A green Start node is always present on the canvas when you begin.Start your flow by dragging your choice of node below the Start node.
Connect the nodes.
Connect them by hovering your cursor in the center of the Start node, a green dot will appear. Now you can drag that green dot to the node you just inserted. An arrow that connects them will appear.
Bear in mind that there must only be one node coming from the “Start”node.
This is how you generally connect any nodes, just hover over any node, a green dot will appear; and a connecting arrow can be drawn.
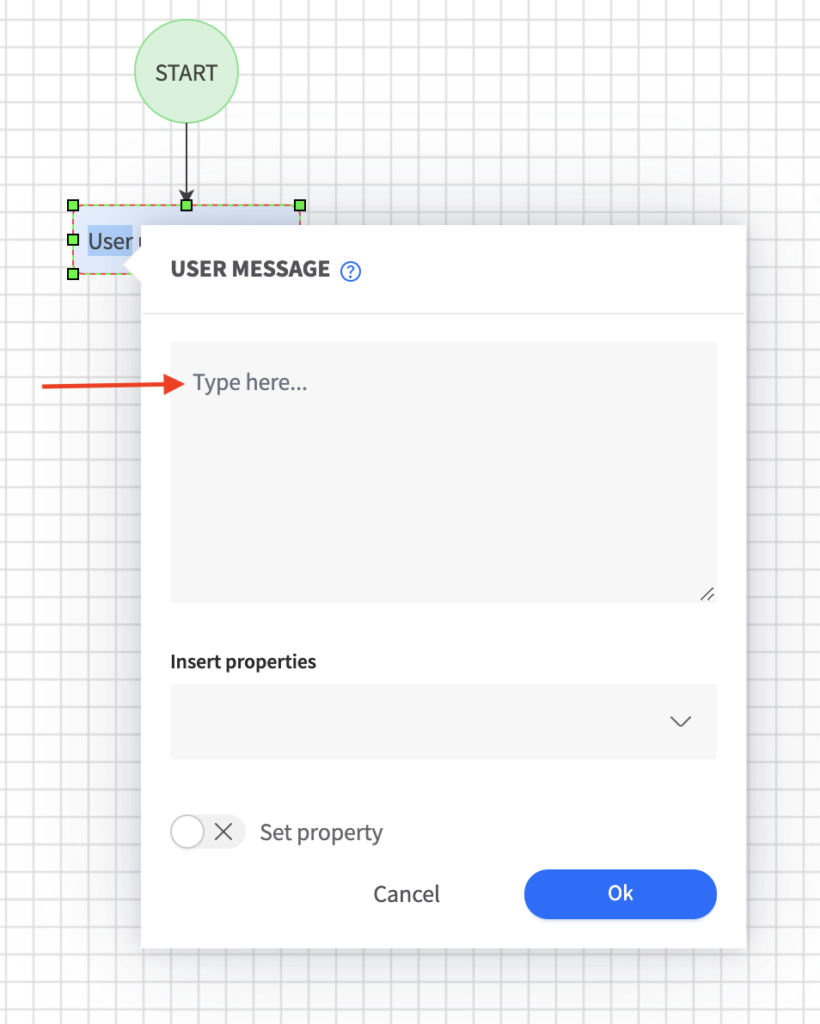
Open the node, fill in necessary info.
The user message will have a red frame around cause it’s still incomplete, no text filled in yet. The frame could stay red if there are obvious wrong details, or if you have set the dialog to contain more than one language, and a language version for that User messages is missing.
Click to open the User message popup window. In the first box, type the initial question that will start the flow.
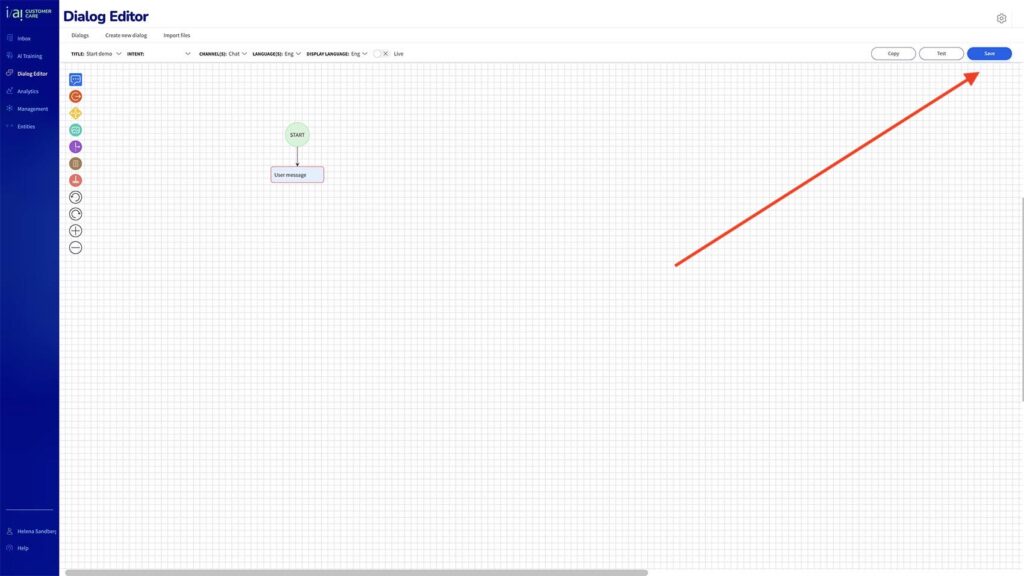
From here, carry on by adding and connecting more nodes from the first User message node, until your flow is complete.
Open the node, fill in necessary info.
The user message will have a red frame around cause it’s still incomplete, no text filled in yet. The frame could stay red if there are obvious wrong details, or if you have set the dialog to contain more than one language, and a language version for that User messages is missing.
Click to open the User message popup window. In the first box, type the initial question that will start the flow.
From here, carry on by adding and connecting more nodes from the first User message node, until your flow is complete.
More than one language.
If you have set this flow to present more than one language, go to top menu and select other DISPLAY LANGUAGE, and fill in a translation for every language you have chosen to present.
To see another language as a template for your new copy, choose language in dropdown “See message in other language”.
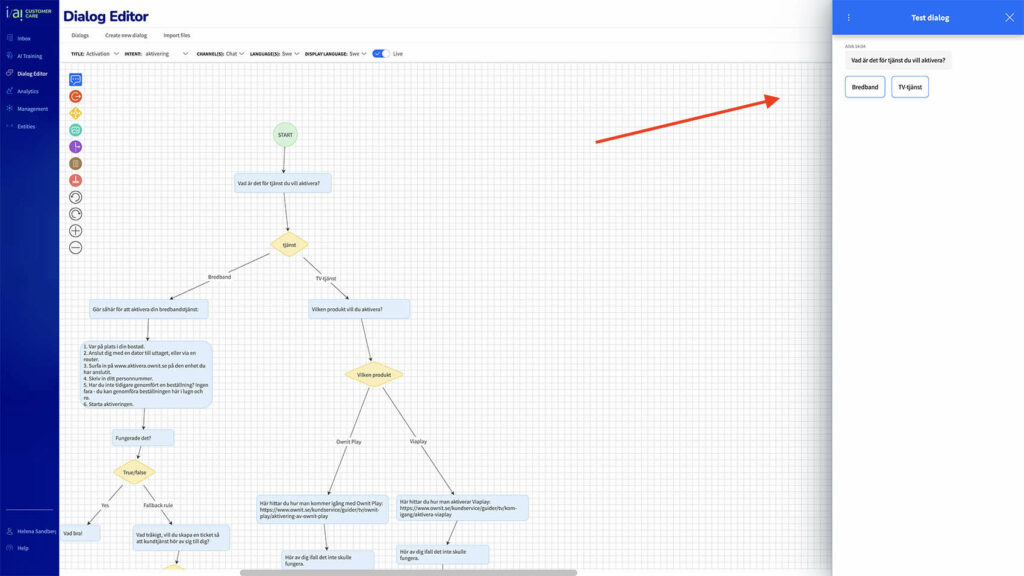
Test the dialog.
Before publishing your flow to “Live” and making it available for your end-users, it’s a good idea to test the flow.
By testing the flow you get a feeling for how end-user’s will experience your tone of voice amount of words. Is it too long, too short? Does it feel natural?
There’s 2 ways to test a dialog. 1. Test within the dialog you’re creating: Click “Test” button to the right of the “Save” button in top. A fly-out will appear and you can test-run the dialog to make sure all options, decisions, links and alternatives works. 2. Test a particular dialog from the Greeting Dialog. Open the built-in Greeting dialog, click “test” button. Here you have the possibility to type the end-user’s inquiry and you will be able to check that the intent and training phrases works.
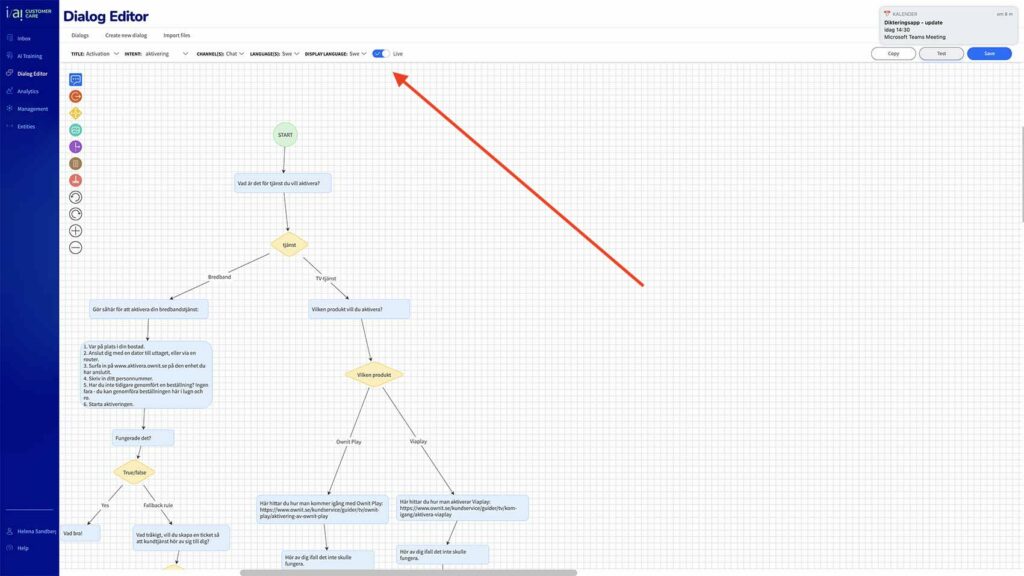
Publish the dialog to "Live".
If everything seems to work, you can go ahead and publish your flow by switching the “Live” button just above the canvas area, and then “Save” again. Now your flow is available to your customers.
This website uses cookies to ensure you get the best experience on our website.