1.1 Overview
The purpose of the admin panel is to onboard new clinics into our voice-to-text
solutions. The admin panel will help users to add new clinics, create or import
schemas from the journal system. Right now, voice to text admin panel
supports Webdoc and J4 journal system. Users can easily update the schemas
based on the requirements from clinics within the shortest period.
1.2 The role of Admin UI
When a doctor sends the patient audio data, it gets retrieved by Inovia’s AI
engine and a secretary can see the text data extracted from the doctor’s
appointment. The secretary can use a UI to edit the transcription and it is
possible to send that data to the designated journal system. To show the
transcription data properly in the UI, the transcription has to belong to a
schema. A clinic or health care entity may have multiple schemas. A schema
can be created from the Admin UI. Apart from creating a schema, Admin UI
provides all the necessary ways to configure a clinic, schema and incoming-
outgoing channel (from where the data comes from, and where it shall be
stored after editing) of the schema.
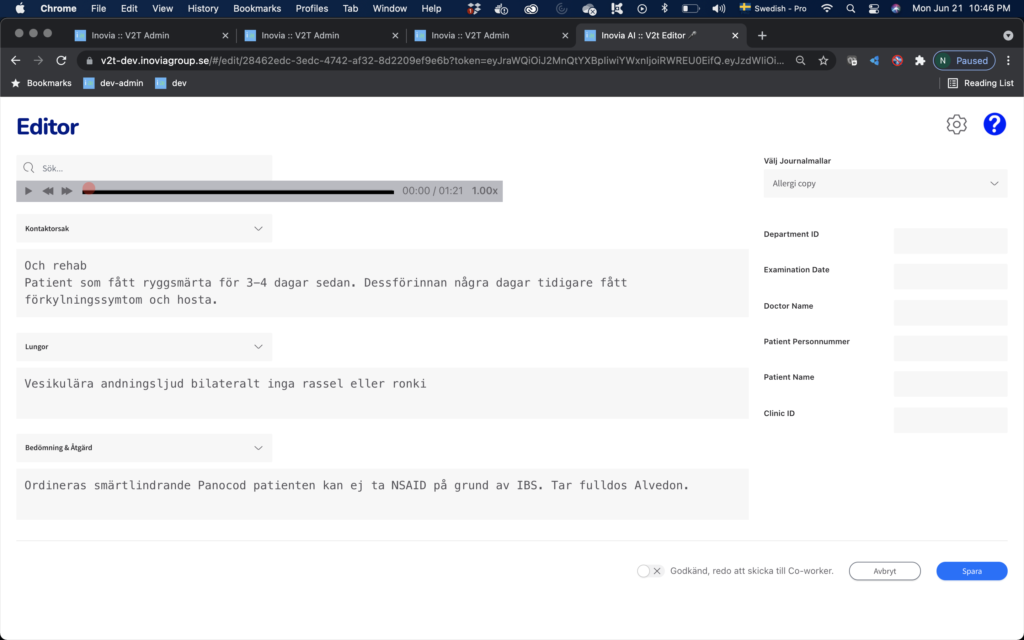
In figure 1, a sample transcript is being shown with some fields (for
example Lungor, Patient Name). These can be different for different
appointments. And these can be configured from the Admin UI.
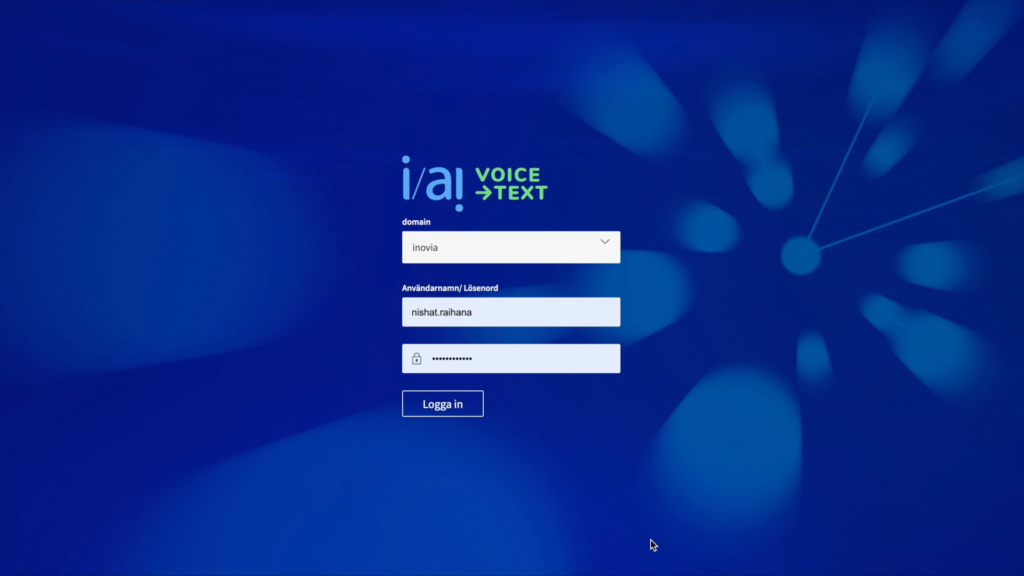
1.3 Access to voice-to-text solution
To be able to login into the Voice to Text admin panel, you need to provide your
user credentials. Make sure to select the correct domain for which you have
your user credentials. Insert username and password. Click “Logga in.”

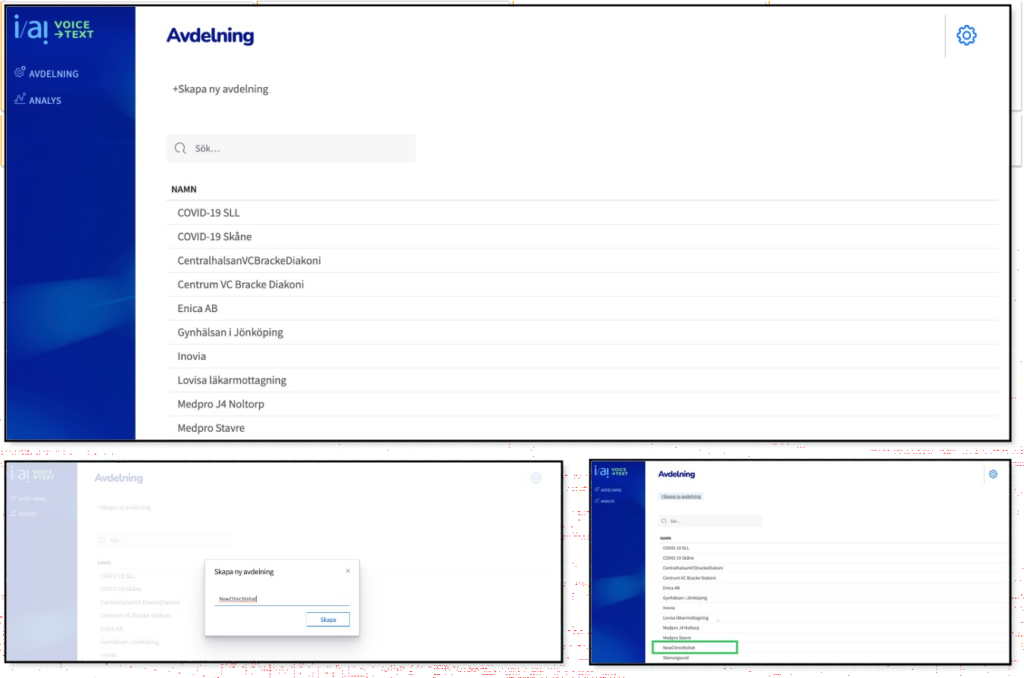
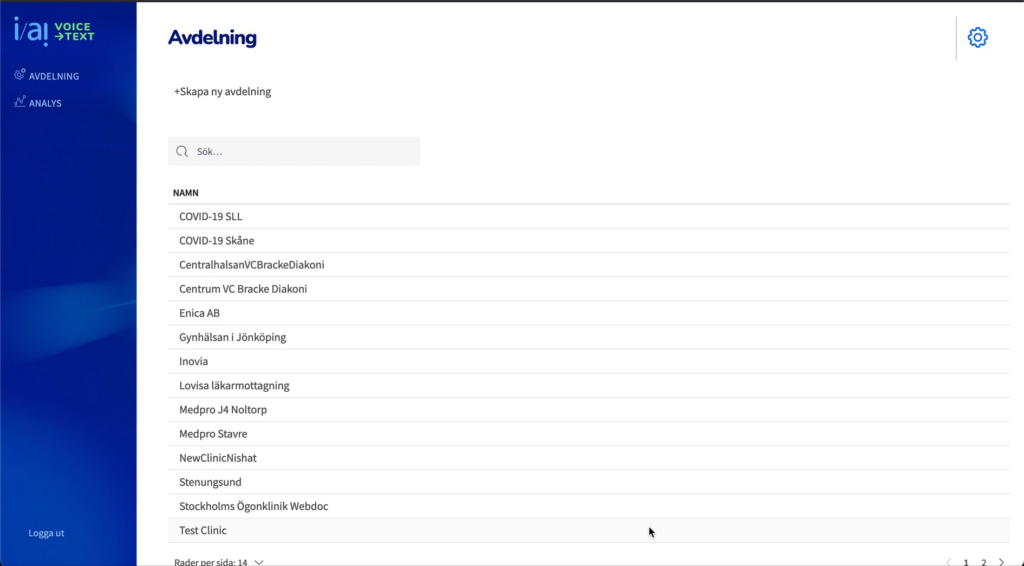
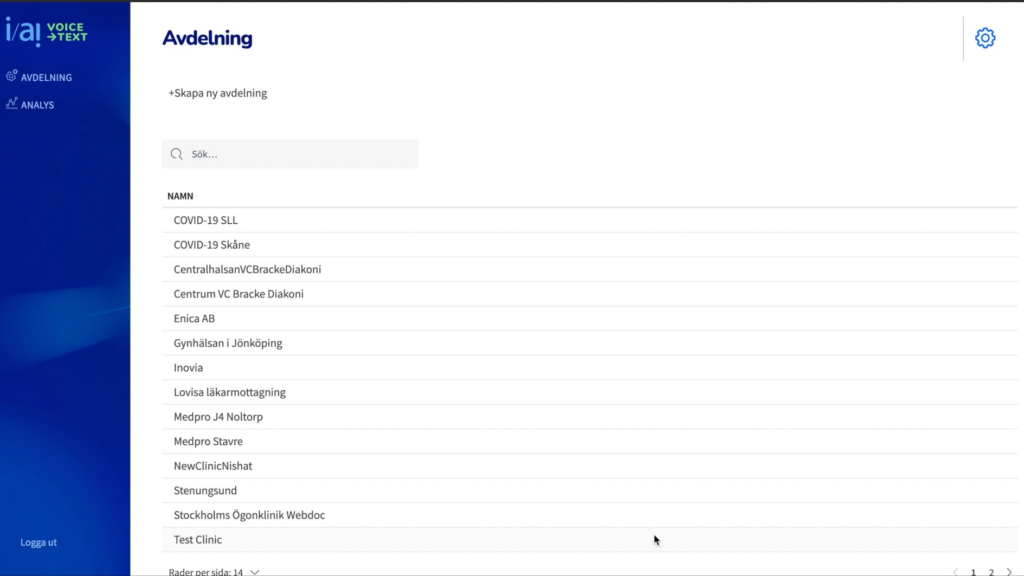
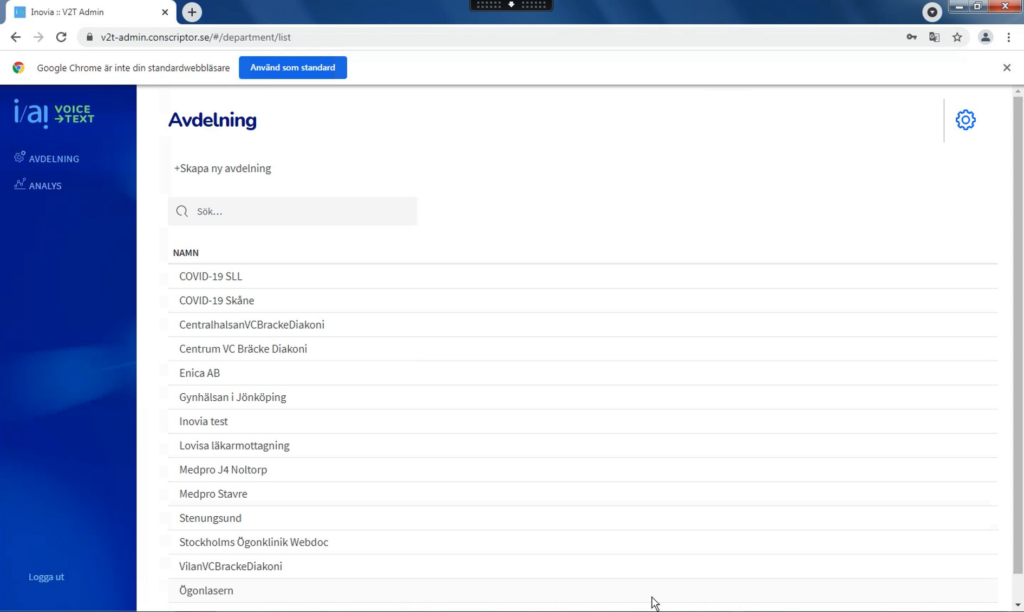
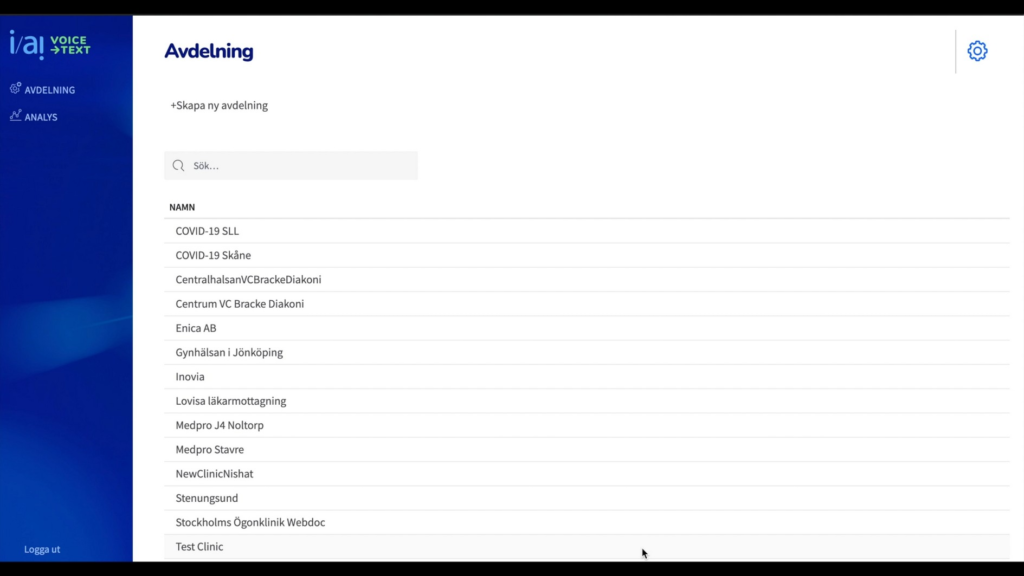
1.3 Create a new department
- Login into the system (Production server – https://v2t-admin.conscriptor.se/)
- Click on “Avdelning”
- Click on “+skapa ny avdelning”
- Enter the name of “new department”
- In the homepage, user can see the name of department
For more details view, please look at the attached video –
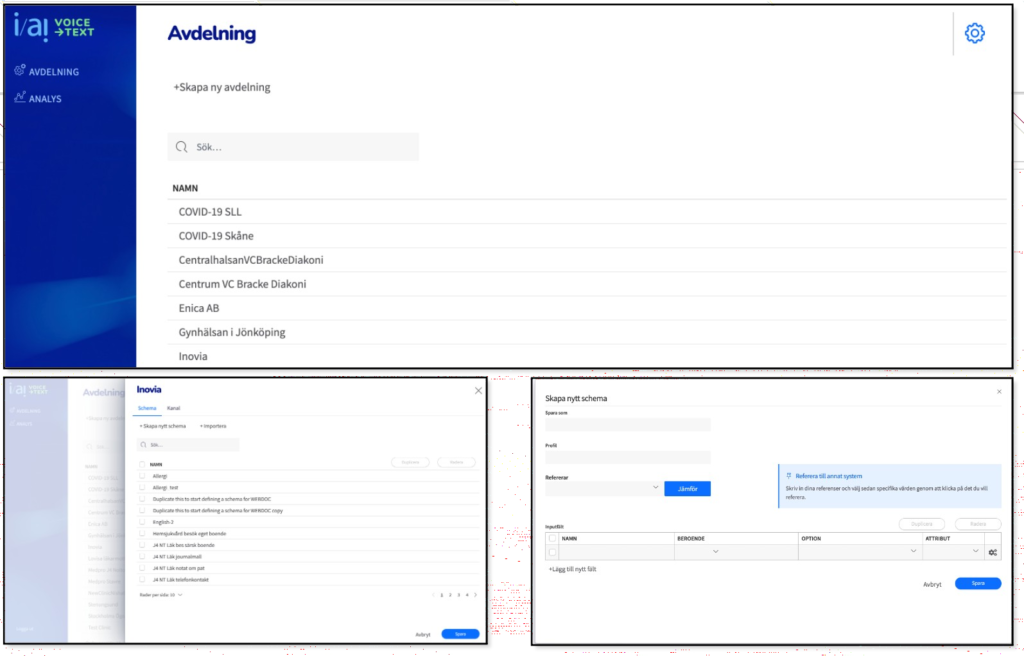
1.4 Create a schema
- Click on the “new department.”
- Click on “Schemas.”
- Click on “+ Skapa nytt schema”
- Enter the information in the following way:
- Spara Som: Enter the name of schema as in Medspeech
- Profil: put “default”
- Refererar: Select from drop down if its “webdoc besök/anteckning/j4…”
- Put the information in the following way in “inputfält”
- Name: Name of the fields in Schemas
- Beroende: If the field has a dependency on another field (which means if a field requires another field), mention that field name in this section.
- Option: If a field has a pre-defined fixed value, please mention it here. For example – Smoking has an option like – “yes” or “no”. Then enter the following two options in this section.
- Attribute: Select the options from the field. (It can be editable, visible, required, indexed, default, multi-select). For the first field, it should always be “default”
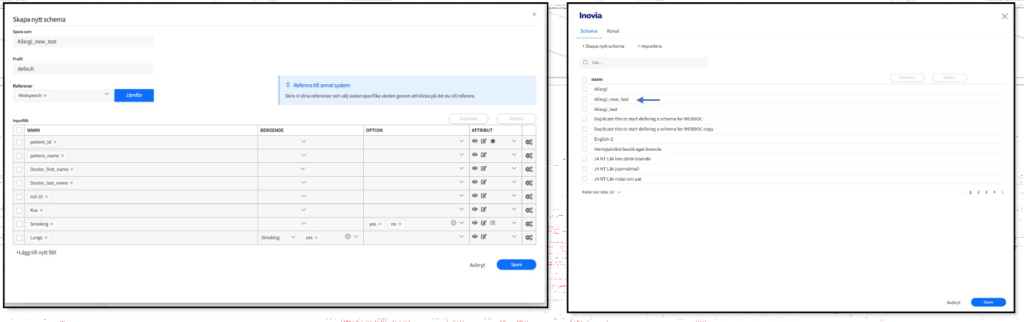
- User can also use the “duplicera” field to duplicate a field.
- User can use “Radera” to delete a field.
- To add a new field, click on “Lägg till nytt fält”
- To save the schema, click on the “spara”
For more details view, please look at the attached video –
play)
1.5 Link schema with Channel
- Click on the “new department.”
- Click on “Kanal/channel.”
- At first enter information for “Inkommande kanaler”
- Click on “Lägg till Kanal”
- Enter the following information into the “Inkommande kanaler”
- Namn: From where we get the information. (e.g. “Medspeech”)
- Läkare: Write down the name of the doctor and press “Enter”
- Scheman: Put the name of the “Schemas” as in Medspeec
- Avdelning: Put the name of “Department” as in Medspeech
- Enabled: Put “no”
- Enter the following information into the “Utgående kanaler”
- Click on “Lägg till Kanal”
- Enter following information into the “Utgående kanaler”
- Namn: Mention if its “Webdoc/J4”
- Klinik: Put the name of “Department” as in Medspeech
- Aktiverad: Yes
For more details view, please look at the attached video –
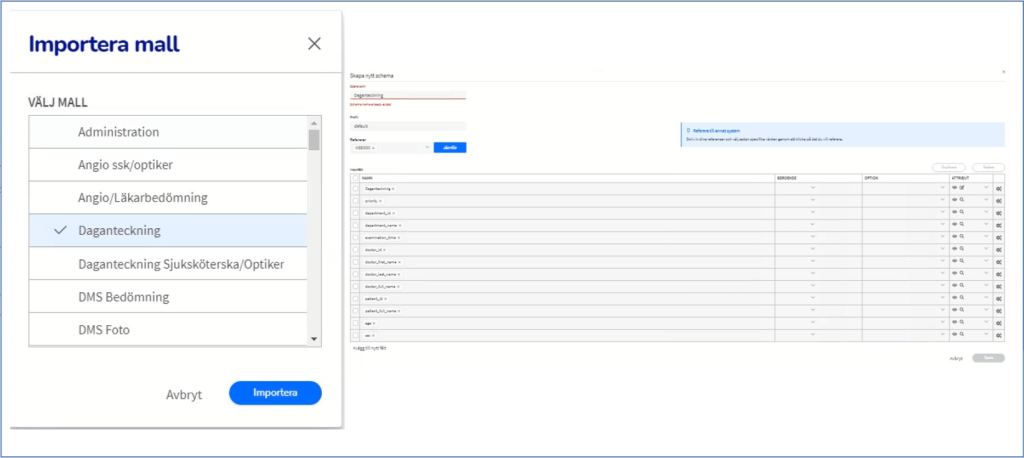
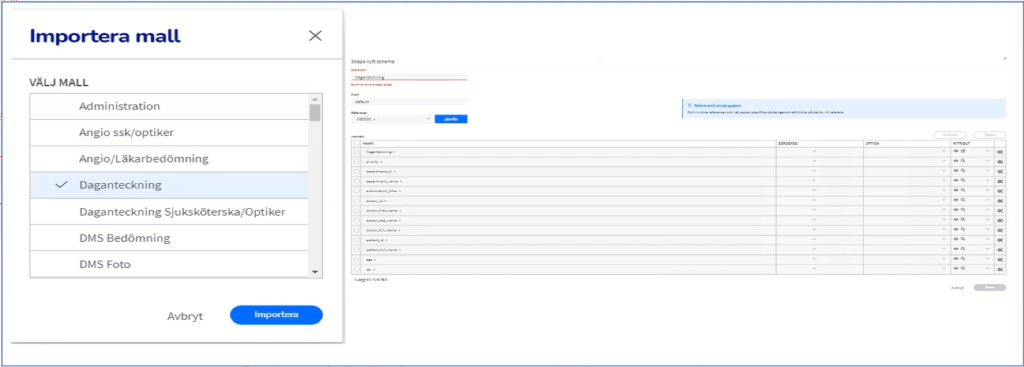
1.6 Import a Schema
- Click on the specific clinic
- Click on “+Importera”
- Choose the schema
- Click on “importera”
- Schema will be imported
- Change the schema accordingly
- “Spara” the schema
- For importing schema from J4, log in with the id/password you used to log into the production server.
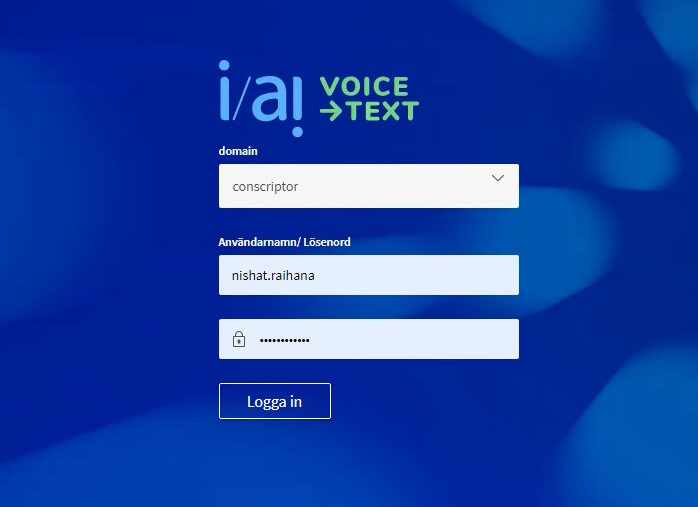
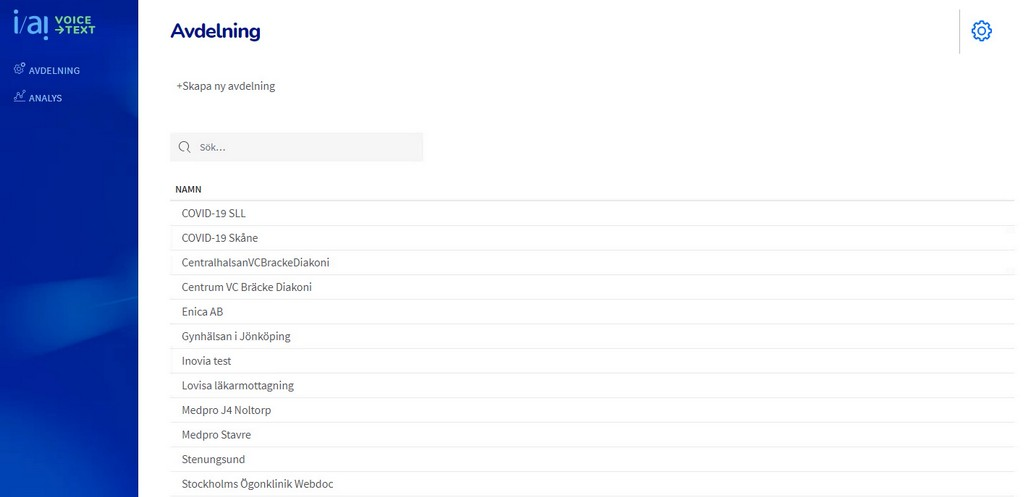
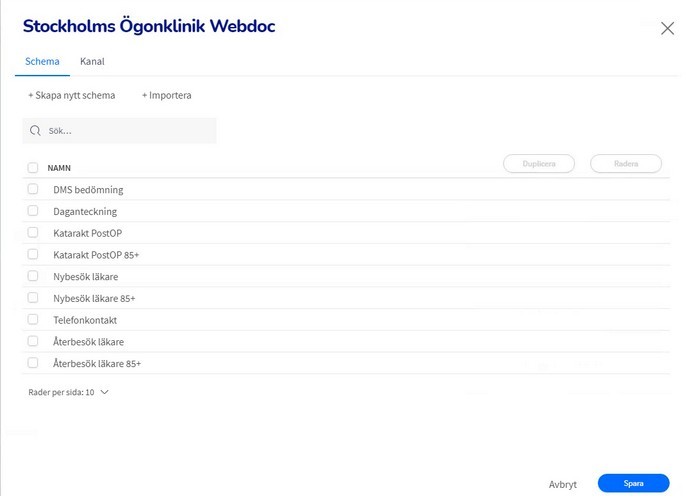
Figure 6: Import schema(a)
For more details view, please look at the attached video –
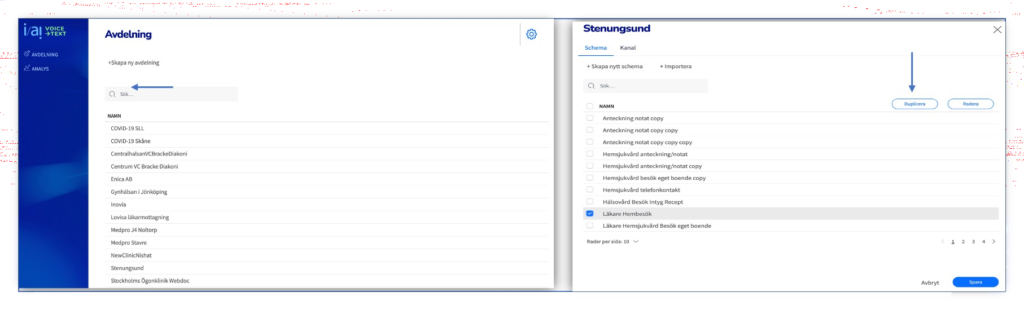
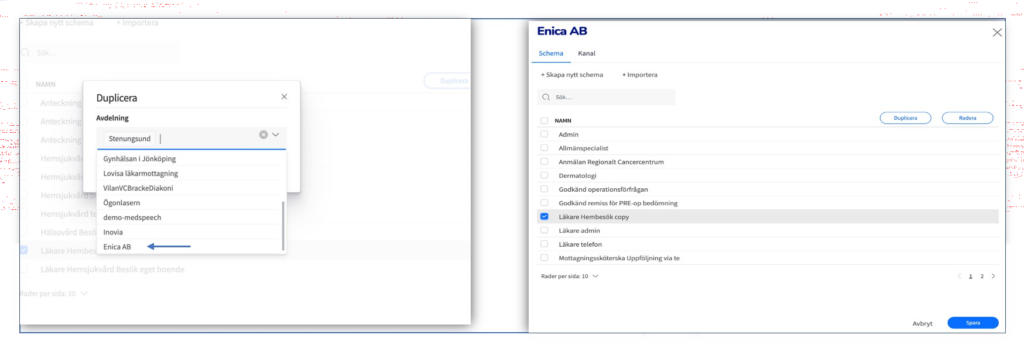
1.7 Duplicate a schema within same journal system
- Click the specific clinic
- Select on the schema that the user want to copy
- Click on “duplicera”
- Choose the “avdelning” where user want to copy
- Again, click on “duplicera”
- Upon successful duplicate following message will pop up “Schemat duplicerades”
- User can also “radera” any schema.


For more details view, please look at the attached video
Video 5: Duplicate schema within same journal system (double click to play)
Glossary
| Terms | Definition |
| Channel | Data source or destination |
| Department | Name of the clinics or healthcare entity |
| Journal system | Data storage for recording patient medical history |
| J4 | A journal system |
| Schema | Structure of a transcript with necessary information. |
| Webdoc | Another type of journal system |
